This step-by-step guide on installing a glass electric fireplace console offers clear instructions for setting up this elegant home feature. The process begins with selecting an appropriate location and preparing the installation area, followed by assembling the console and securing it to the wall, if necessary. The guide emphasizes safety precautions, such as ensuring proper electrical connections and maintaining adequate ventilation.
Table of Contents

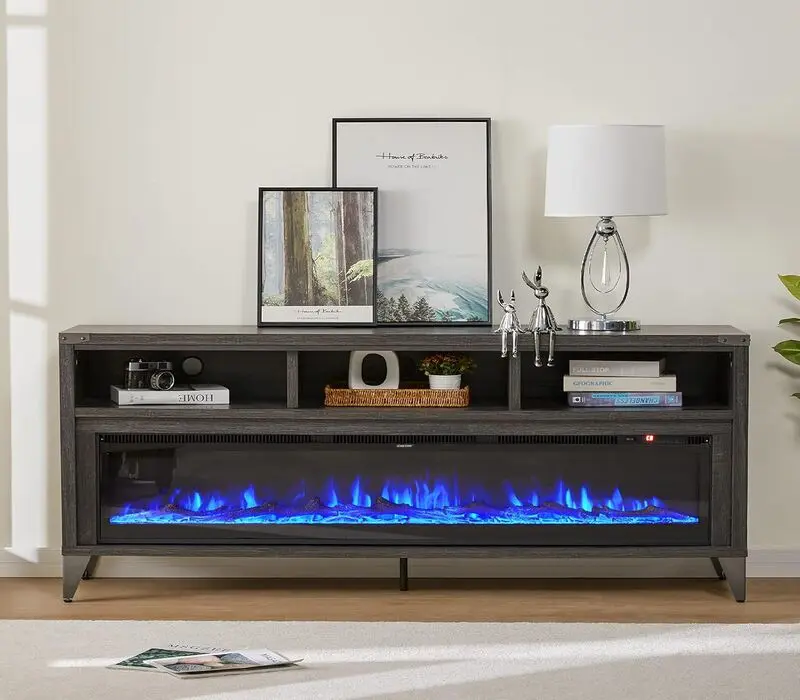
AMERLIFE 75in 3-Sided Glass Fireplace TV Stand for TVs up to 85", Rustic Media Entertainment Center Console Table with Glass Door Closed Storage, Distressed...
Step-by-Step Electric Fireplace Console Installation
Gather Your Tools and Materials
Gather all necessary tools and materials before beginning the installation. Having everything ready in advance can save you time and prevent unnecessary delays during the setup process.
You will need:
How to Choose the Best Location for Your Electric Fireplace Console
Select a location for your glass electric fireplace console that is near an electrical outlet to ensure easy access for powering it on. Placing it too far from a power source may require the use of an extension cord, which is not recommended due to safety concerns. Avoid placing the console near flammable materials such as curtains, furniture, or paper products; these can pose a fire hazard if they come into direct contact with the heat source. Ensure the surface where you place the console is level and sturdy, as an unstable base can lead to accidents or damage.
Use a solid table or a media stand that can support the weight of the console without wobbling or tipping. Additionally, consider positioning the unit in a central location where it can provide optimal heat distribution throughout the room. A well-placed electric fireplace console enhances comfort and improves energy efficiency by evenly distributing warmth. Installing a glass electric fireplace console requires careful planning to ensure stability and efficiency. Choosing a compatible fireplace TV stand is just as important as the installation itself. If you’re setting up in a smaller area, explore our best electric fireplace TV stands for small spaces guide.
Assemble the Console Parts
Carefully unpack the fireplace console from the box, ensuring you remove any protective materials like foam or plastic. Lay out all the parts, including the main body, legs, hardware, and any additional components. Organizing the pieces before starting the assembly can help prevent confusion and streamline the installation process.
Follow the manufacturer’s instructions and align the legs or base with the pre-drilled holes on the underside of the main body. Secure the legs using the included screws, making sure each screw is tightened adequately to provide stability. If your console includes an additional shelf, attach the brackets before placing the shelf in position. Some models may come with decorative panels or covers—if applicable, ensure these are securely attached to enhance both stability and aesthetics. Taking your time during this step will ensure a strong, well-built setup that lasts for years.

AMERLIFE 65" Fireplace TV Stand with 60" Glass Electric Fireplace, Industrial & Farmhouse Media Entertainment Center with Open Shelve Storage for TVs Up to...
Install the Electric Fireplace Insert
Align the electric fireplace insert with the designated opening in the console. Slide the unit carefully into place, ensuring it sits flush against the back and sides for a secure fit. A misaligned insert can impact heat output and overall functionality, so please ensure it is positioned correctly. Follow the manufacturer’s guidelines for specific measurements and clearance requirements. Make sure that all connections are easily accessible and unobstructed by any surrounding materials.
If your model requires additional securing mechanisms, such as brackets or screws, ensure these are properly installed to prevent movement over time. A well-fitted insert ensures efficient heat distribution while enhancing the visual appeal of your fireplace console. Pairing a glass electric fireplace console with the appropriate electric fireplace stand can significantly enhance warmth and ambiance. See our top recommendations for creating a cozy and efficient space.
Wall-Mounting Guide for Electric Fireplace Consoles
If your fireplace console requires wall anchoring, locate the brackets provided by the manufacturer. This step is especially important for taller or freestanding units, as securing them to the wall can prevent accidental tipping.
Position the console where you want it, ensuring it’s level and stable, then mark the wall with a pencil through the bracket holes. Drill pilot holes into the marked spots and attach the brackets to the wall using screws. Once secured, fasten the console to the brackets to prevent tipping, ensuring safety—especially if you have children or pets. A properly secured fireplace console provides peace of mind and prevents potential hazards in high-traffic areas of your home.


Connect the Electric Fireplace to Power
Plug the glass electric fireplace console into a properly grounded electrical outlet. Ensure the plug fits securely in the socket and that the cord is positioned away from sharp edges or heavy furniture to prevent damage. If possible, use a surge protector to prevent potential electrical issues caused by power fluctuations.
Before turning on the unit, check that any power switch on the console is in the ‘off’ position. Once all connections are verified, turn the power switch to ‘on’ to activate the fireplace. If your unit has adjustable heat and flame settings, take a moment to explore these options for a more customized experience.
Test the Electric Fireplace
Turn on the electric fireplace using the control switch or remote. Observe the heating element as it activates, ensuring it warms up efficiently. If your unit includes different heat settings, test each one to confirm that the temperature adjusts correctly.
Check the lighting effects to confirm that they illuminate properly without flickering. If you detect any unusual sounds or smells, immediately turn off the unit and inspect it for issues before proceeding with regular use. Conducting this test ensures that your fireplace is fully operational and safe to use before long-term operation.
Final Setup & Safety Tips for Electric Fireplace Consoles
Make final adjustments by checking the alignment of the console with surrounding furniture. Proper positioning can enhance the aesthetic appeal of your space while ensuring accessibility to controls and power outlets.
Use a level tool to ensure it is straight and stable, making small adjustments to the feet or base as needed. Perform a final safety check by inspecting all screws, bolts, and connections to confirm they are securely tightened. Regular maintenance, such as dusting the console and checking the power cord for wear, can help extend the lifespan of your unit. Testing the functionality of the console once more ensures smooth operation before finalizing the setup.


Final Steps and Tips
Installing a glass electric fireplace console is a rewarding project that enhances both the ambiance and functionality of your living space. Taking the time to follow each step properly ensures that your unit is safe, secure, and performing at its best. By following these easy installation steps, you can enjoy a stylish and secure setup that provides warmth and elegance for years to come. Make sure to regularly clean and maintain your fireplace console to preserve its appearance and efficiency.
When deciding between a glass electric fireplace console and a corner fireplace TV console, there are several factors to consider, including space availability, style, and heating efficiency. Compare the best options in our guide to choosing the perfect corner fireplace TV console.
Essential Equipment List

Installation Made Easy
